
You can easily save money by creating your own invites- for any occasion!
Items needed-
- Vellum paper (any office supply store) Vellum Paper at Michael’s
- Color printer
- Template to print 4 per sheet (ask me for the template to print)
- Paper cutter (for precision) or just scissors
- your favorite baby photos
- Cardstock or scrapbooking paper- just not flimsy
- sticky dots (used for scrapbooking)
- envelopes
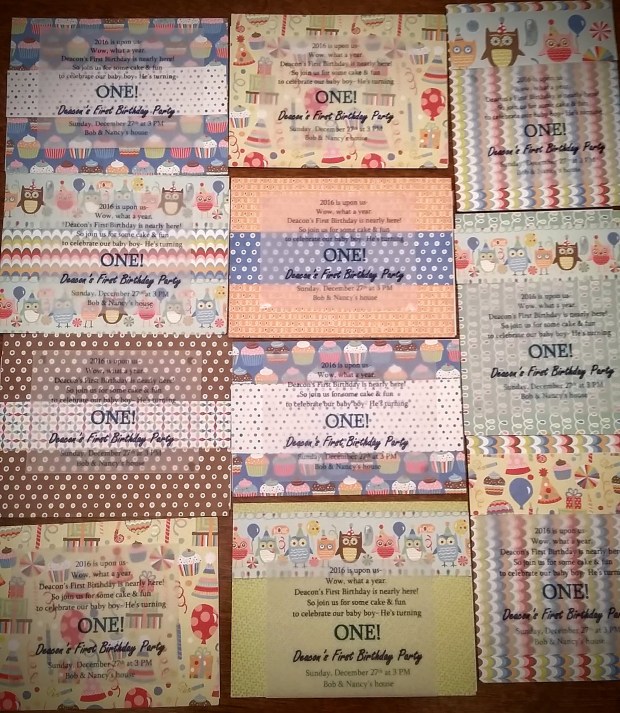
I found adorable birthday themed cardstock that came in a booklet from Michael’s. The colors, owls and cute little whimsical birthday party designs were perfect for Deacon’s first birthday. But really, any sort of card stock will work. I’d recommend layering some colors to create frames. The paper I used is very cheerful but busy. For a more formal look use soft prints or colored cardstock with a sheen.
I print my high res photos from Mpix. If you hit a sale on mpix.com, you can get them for less that what you pay at a retail 1 hour store and the quality is 10x better. I really like the idea of our friends and family keeping the photos and framing them or just keeping them on their fridge, rather than the printed invitations that are lesser quality photos and may end up in the trash after the birthday party.
So, I made up the wording for the invite, printed on vellum paper, did lots of cutting with the paper cutter (at work!), used glue dots to put all the pieces together and that’s it! (Tip- when applying the sticky dots, place one in each corner of the photo- not in the middle. Place just 2 on the top corners when applying the vellum paper.)
I had envelopes left over from a previous project and the size worked perfectly. You can make these cards 4×6 or 5×7- whichever works best for you. You will have to orient the cards differently (landscape or portrait depending on the photo you decide to use).
Also, I realize many of you may want to keep your invites consistent and so just be sure to buy about 12-20 sheets of the same paper/ cardstock, depending on how many you need, and print the same photo. I love the idea of everyone getting their own unique invite. For example, my goofy cousin Billy got the card with the cheerio on his nose and my Granny got the sweet newborn photo.


This last photo shows a DIY party decoration. It highlights photos of the first year of our son’s life, 1 for each month. I used the same technique and then just simply taped these cards to cute blue ribbon. I used stickers for the #s , i.e. “6” for 6 months old. Voila! I’ll keep this is his keepsake box for him to see later!
Happy crafting friends!
